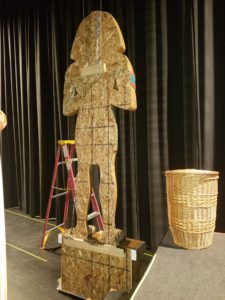
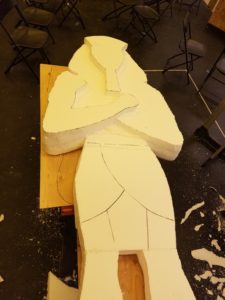
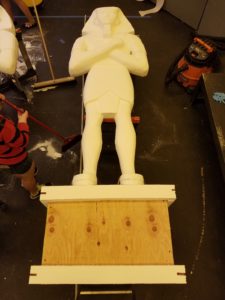
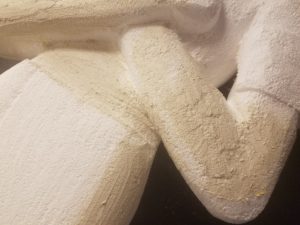
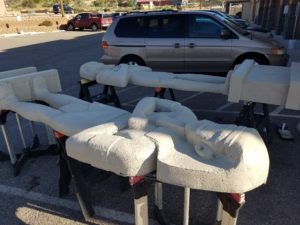
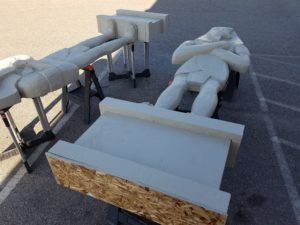
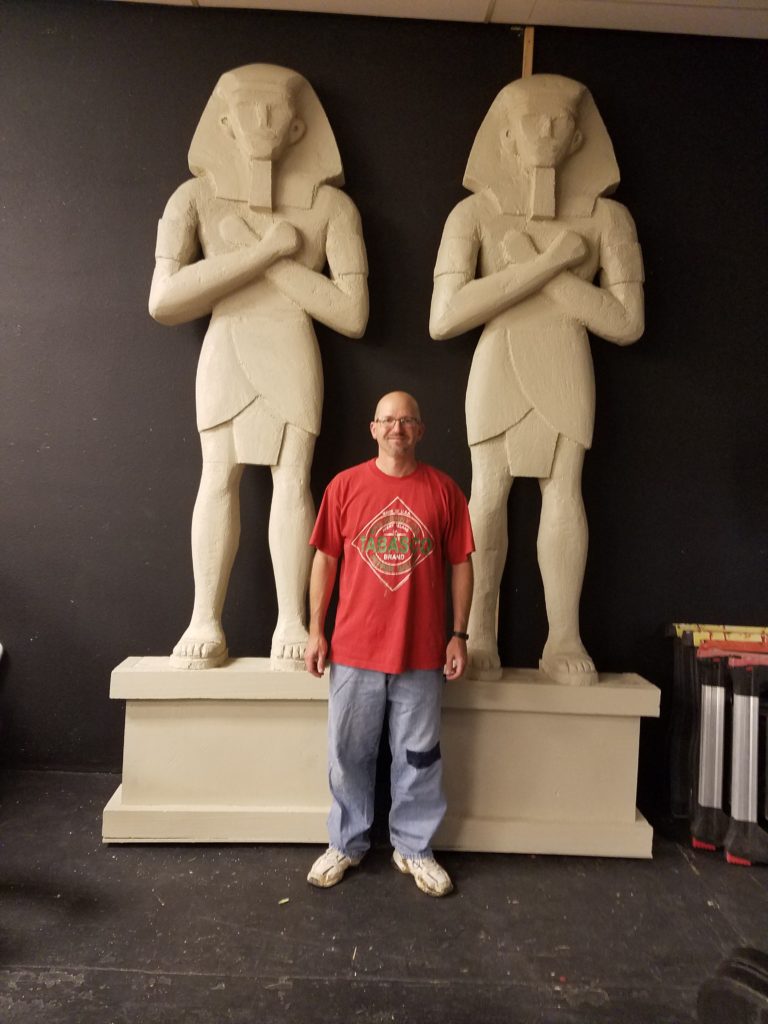
The Ramses Twins – Egyptian Statues for “Joseph and the Amazing Technicolor Dreamcoat”

When our local children’s theater company announced a production of “Joseph and the Amazing Technicolor Dreamcoat” this summer, I immediately began thinking about some fun projects I could do for the show. I’ve always wanted to do some larger-than-life sculpted figures, and this seemed like the perfect time to do that.
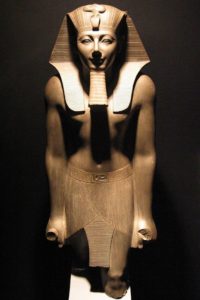
luxor-ramsesA big part of our Egypt set consisted of a large stair-step pyramid right in the middle of the stage. The plan was for Pharaoh to be lifted up to the top from  behind (on a scissor jack) and step forward onto the top of the pyramid. As I thought about dressing up the stage, I remembered photos of the Luxor Temple, with rows and rows of identical statues of Ramses II. Obviously, we couldn’t have a whole row of statues, but two of them flanking the pyramid sounded like a pretty cool idea. Add to that the painted Egyptian columns I was planning and I knew we’d have a beautiful set.

My requirements were straightforward. They needed to go up and down into the flies, so they couldn’t have much depth (less than 18 inches) and they couldn’t be very heavy. They also had to be big—I was hoping for ten feet high or more. They needed to be more or less identical and they had to have “bling,” since this was a Vegas-style version of Egypt.

Inspiration

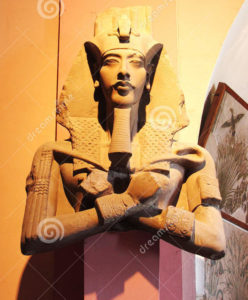
I had trouble finding a good photo of the Luxor Ramses statues to use as a template. Instead, I found this very similar statue, which was pretty symmetrical except that it lacked lower legs. Also, I wanted the familiar “crossed arms” pose with the candy cane and the whip. Apparently this pose makes reference to Osiris, who (according to the Egyptian Book of the Dead) “seized the crook and the flail when … in the womb….” Sounds like a great guy.

 hands-at-side  original-statue-akhenaten-egyptian-museum-cairo-colossus-missing-its-lower-legs-depicts-king-traditional-pose-arms-65149939

So yeah, I wanted that. Totes Egyptian.

Tools of the Trade

Materials for this project:

  • Template paper (on a roll)
  • Masking tape
  • 19/32″ OSB, two 4×8 sheets
  • Drywall screws
  • 2-inch construction Styrofoam
  • Wood glue (several large bottles)
  • Gold paint (base layer and top coat)
  • Acrylic paints (for details)
  • Gaffer tape (black and white)
  • 2 Wire coat hangers

Tools I used:

  • Laptop, projector
  • Pencil and Sharpie marker (for drawing and tracing template)
  • Jigsaw
  • Drill with Phillips bit
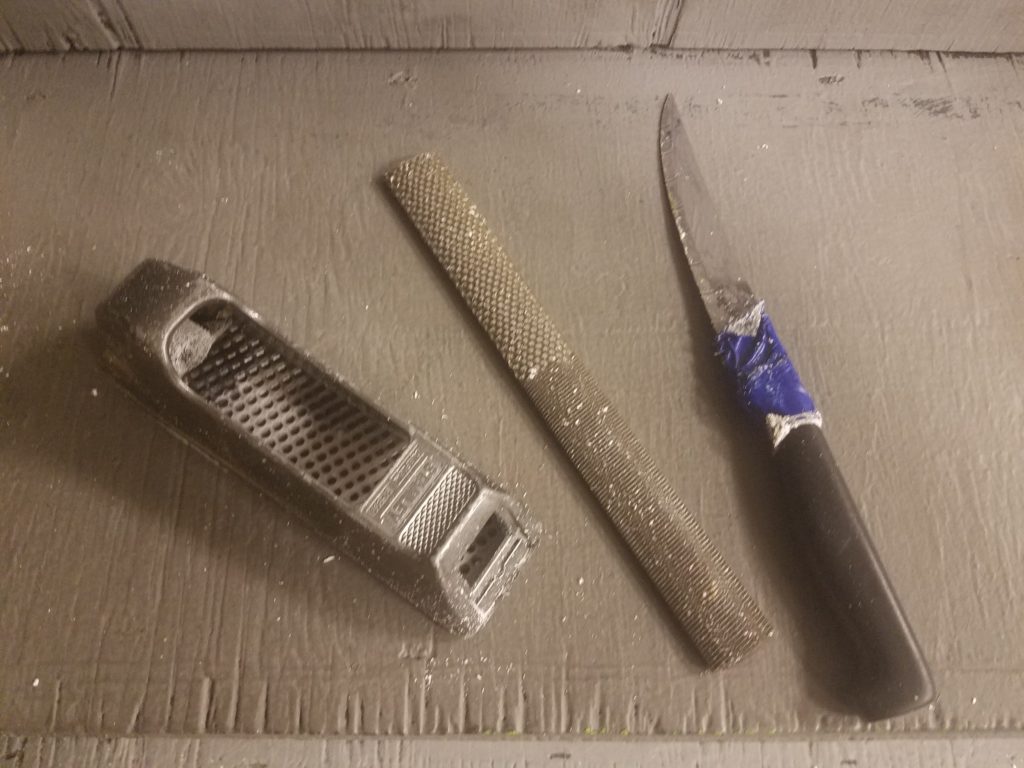
  • Serrated steak knife (for rough carving)
  • Small hand planer (for smoothing)
  • Shoe rasp (for detailed shaping)
  • Heat gun

We didn’t even have to buy any foam for this project. I had several full sheets (and some parts and scraps) still in storage from my Cave of Wonders project for “Aladdin” last year. So … yay. Big bang for even fewer bucks.

I know it sounds pretty low-tech, but I did all of the carving on this project with a steak knife that I pulled out of my camping bin on the morning I started building. The blade actually came out of the handle an hour into my first carving, so I “fixed” it with gaffer tape. So here’s a photo of my high-tech tools:

Tools of the Trade

Paper and Plywood

Unfortunately, I didn’t take photos of this first part of the process. But I’ll describe what I did.

When creating any design, one of the key elements is symmetry. This is almost impossible to achieve when you’re tracing a pattern for a design like this. The solution is to  only work on one side. That sounds counter-intuitive, but it really works.

First, I joined two long sections of my el-cheapo template paper. I buy roll ends from the local newspaper for just a couple of bucks each. They’re 22 inches wide, so I taped two strips together to make a 44-inch wide roll. Having the center line was perfect,  because it gave me a good reference for the exact middle of the paper.

I taped the paper to the wall and hooked my laptop up to a projector. I fiddled with the zoom on the image until I got it right in the middle of the sheet, at the right size for what I was hoping to do. I knew I was going to add to the height and scale of the statue by using a plinth (a traditional statue base). I didn’t bother creating a design for the plinth—that would come later.

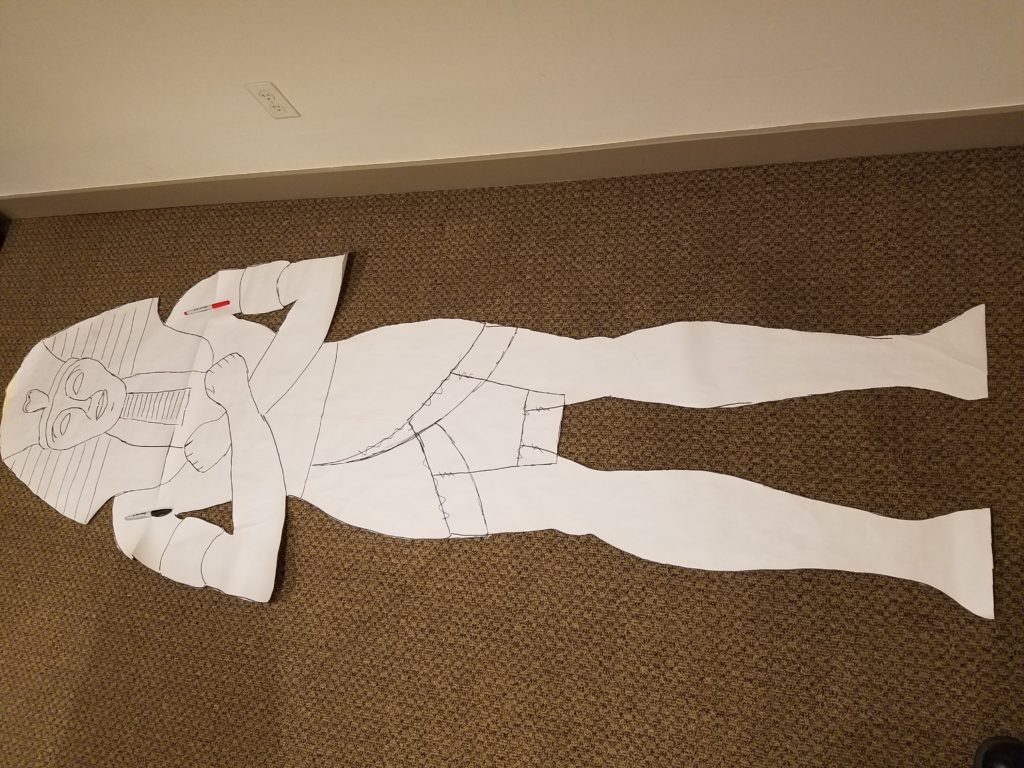
As I mentioned, I combined two designs to make this work. Basically I just drew the outline for the first section, then projected the second image onto the chest (for the crossed arms) and adjusted until it fit. Once I had half of a design, I darkened the half-outline with a Sharpie pen, folded the design in half, and traced the other side to create a perfect mirror image. I filled in a few gaps and ended up with a completed design. Here’s what it looked like.

20160830_125250

You’ll notice that I ended up lengthening the shendyt, or wrap-around skirt, at the request of the director. Even though the Egypt in “Joseph” is kind of Vegas-ish, we’re still in Utah and this was going to be a “family show.” Modest is hottest, right?

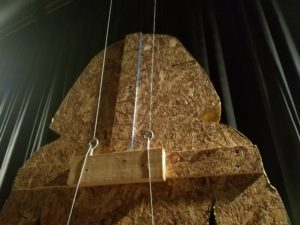
After cutting out the final design, I lay it on top of a sheet of 19/32″ OSB (construction waferboard). I went with the slightly thinner stuff because I knew there wouldn’t be much weight. I laid out the plinth with a yardstick and cut the thing with a jigsaw. Since the final design was about ten and a half feet tall, I started the base at the bottom of the board and used the leftover pieces at the top for the head, screwing them together with drywall screws. The screws stuck out through the front but that wasn’t a biggie. The screw points were going to be covered up soon with foam.

20160829_180852  20160829_180908

The photos above are the back of one of the statue cutouts. These photos were taken after the pieces were hung on the flies, but you can see the basic shape and how I cheaped out by using scrap lumber to piece together the tops of the heads. This allowed me to get each shape out of a single sheet of OSB.

Once I had one piece cut out, I plopped it onto a second sheet of OSB and traced the outline for its twin. So far, so good.

Layering the Foam

For  the statue bodies, I used 2-inch-thick construction foam. The foam comes with a plastic covering on one side and foil on the other, so I had to carefully peel that stuff off before using it. I knew I’d have to layer it thicker in some sections than others. This was actually a very good thing. Using wood glue, I put two full layers (4 inches) on the entire bodies. Then I cut out a “torso template” and put another layer from the arms up. I added a fourth layer to the face and one of the arms (to make it easier for them to look like they were crossed. This took some time, because I would have to apply the layer and wait at least a day for it to dry before rough-cutting the shape and gluing up the next layer. I don’t know if it was absolutely necessary, but I rested something flat on top of each layer and put a couple of chairs on top to press the layers together while the glue was drying.

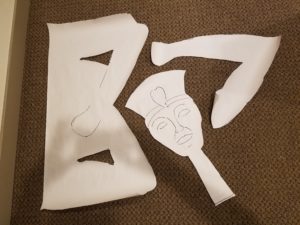
I ended up tracing sub-templates to help me with the layers:

20160830_125456

Working in layers meant I could “pre-sculpt” certain areas by tracing sub-templates and cutting around the layers that needed to be built up. That meant, when I began the shaping process, I wasn’t beginning with just a great big block of foam. The basic shapes were already there … I just had to refine them.

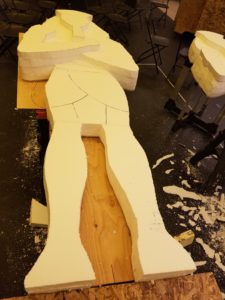
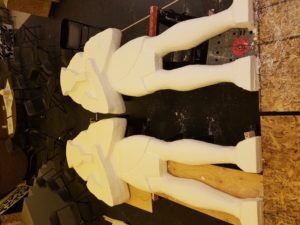
At this point we began calling these things the “Ramses Twins.” Here’s how they looked after several days of gluing and cutting and layering:

20160801_184122  20160801_184125

You can see that I’ve outlined the shendyt. Also, the feet are still just kind of shapes. I would have to wait for the plinth box to be built before building them up.

Carving the Foam

Now it was time to make a real mess. Seriously, Styrofoam is really awful to work with. I had to wear a filter mask so I wouldn’t breath the stuff in. I tried to clean up after every session, but I kept finding bits and pieces everywhere. Under my watch band. In my ears. Between my toes (if I had been wearing sandals while working). You never get it all. I would have one of the other guys give me a once-over with a Shop-Vac after each carving session, but I still found bits and pieces when I got home. it’s just how things were.

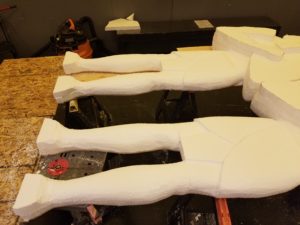
Here are a few photos of roughing in the legs:

20160801_193606  20160801_193556

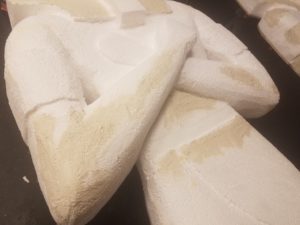
That was the easy part. The torsos and heads were much trickier. Oddly enough, the armpits were the hardest. It was tricky to get the right angle to cut through.

The process was one of shaping by degrees. I would use the steak knife to hack off corners and gouge out areas. Then I would work with the planer to smooth things out. That part of the process was a lot like shaping a surfboard (or so I’m told). The shoe rasp has both rough and smooth sides, rounded and flat, and it was helpful for grinding out some of the finer details. Sometimes I would hit the foam with a heat gun to shrink and firm up the surface a bit, then smooth and shape it with the rasp.

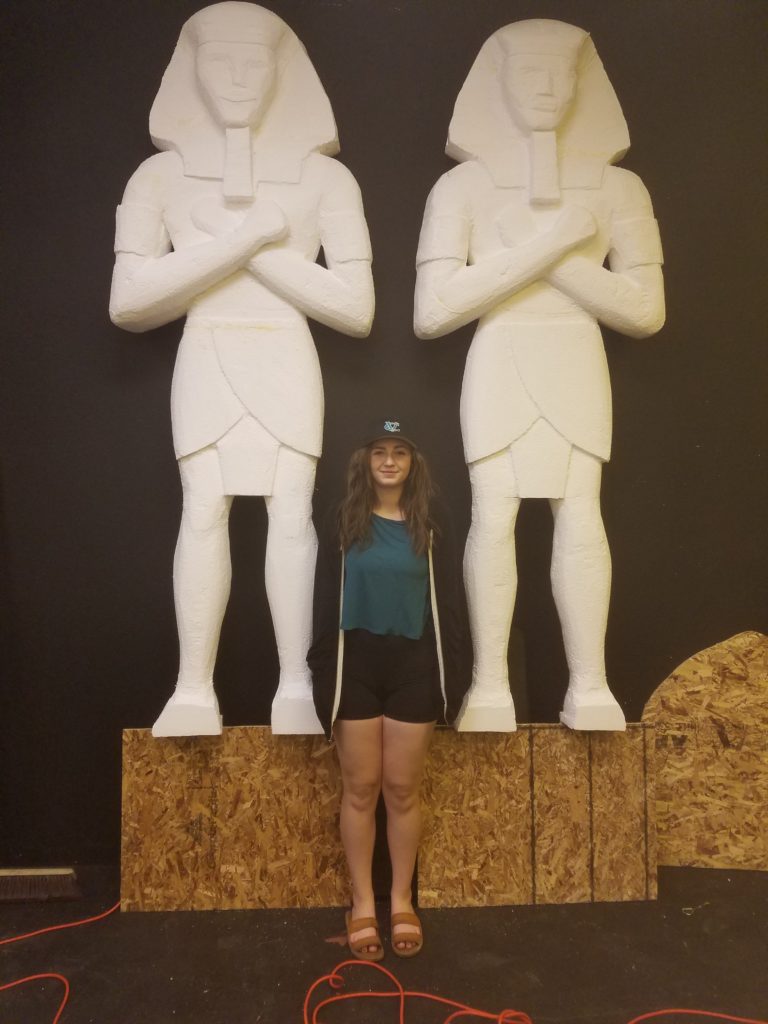
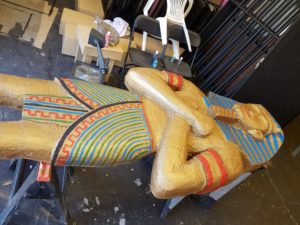
I worked on the statues side by side, trying to keep things even. You can see, though, that when I got them stood up (with my gorgeous daughter to show the scale), the heads were different shapes, and there were other obvious differences. But they were really coming along:

20160803_183849

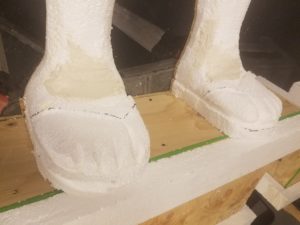
Still needed to box in the plinths so I could work on the feet. Kevin, our sceneshop stud, took care of that while I was doing something else. I also added strips of foam to the tops and bottoms of the plinths to give it some architectural detail. And also … feet and toes and sandals!

20160806_152344 20160808_190717

The feet are intentionally foreshortened. The whole design is slightly flattened because we just couldn’t fit a full-depth statue up in the flies. But nobody would notice that from the audience. You’ll notice in the photo of the feet that I used some drywall compound to fill in some cracks and smooth some rough areas that the planer couldn’t get to. Some more examples:

20160808_190749 20160808_190739 20160808_190734

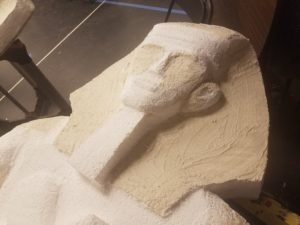
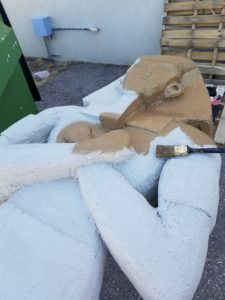
I realized at this time I had forgotten to give the Twins any ears. I carved some and glued them on, then filled in those cracks as well. After letting the drywall mud dry overnight, I sanded it and did a little more smoothing. Then I took the Twins outside and blasted them with a leaf blower to get all the dust and stuff off so they were ready to paint.

Please don’t say anything about the faces. Faces are hard.

Painting and Decorating

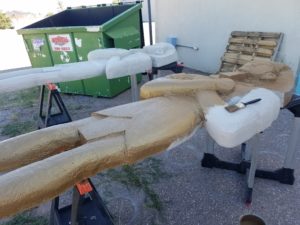
Styrofoam really sucks up paint, so I knew we needed at least one base coat before we got to the bling. I found some tan in the paint shop, so that’s what we used.

20160812_182548  20160812_182541

Several people wanted to stop right here. With the base coat, the Ramses Twins actually look remarkably like the statues in the temple of Luxor:

20160812_191336

(Yeah, that’s me in my work clothes.)

But no. In our version of “Joseph,” Egypt is like Vegas, and the Pharaoh is Elvis. That means they’ve gotta get blinged:

20160813_103735  20160813_102457

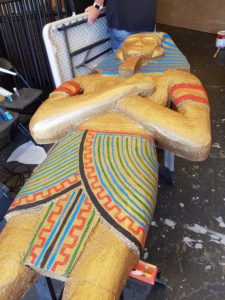
The tan coat helped the gold paint go a lot further. It was pretty thin, and dripped everywhere. I ended up doing two coats. After that it was time to bring them in and add the hand-painted details. I used the same color palette I’ve seen in death masks and sarcophagi: blue, green, red and black. The idea was just to make them pop on the stage.

20160813_125523  20160813_125513

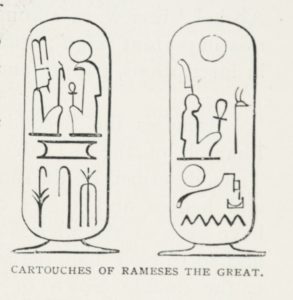
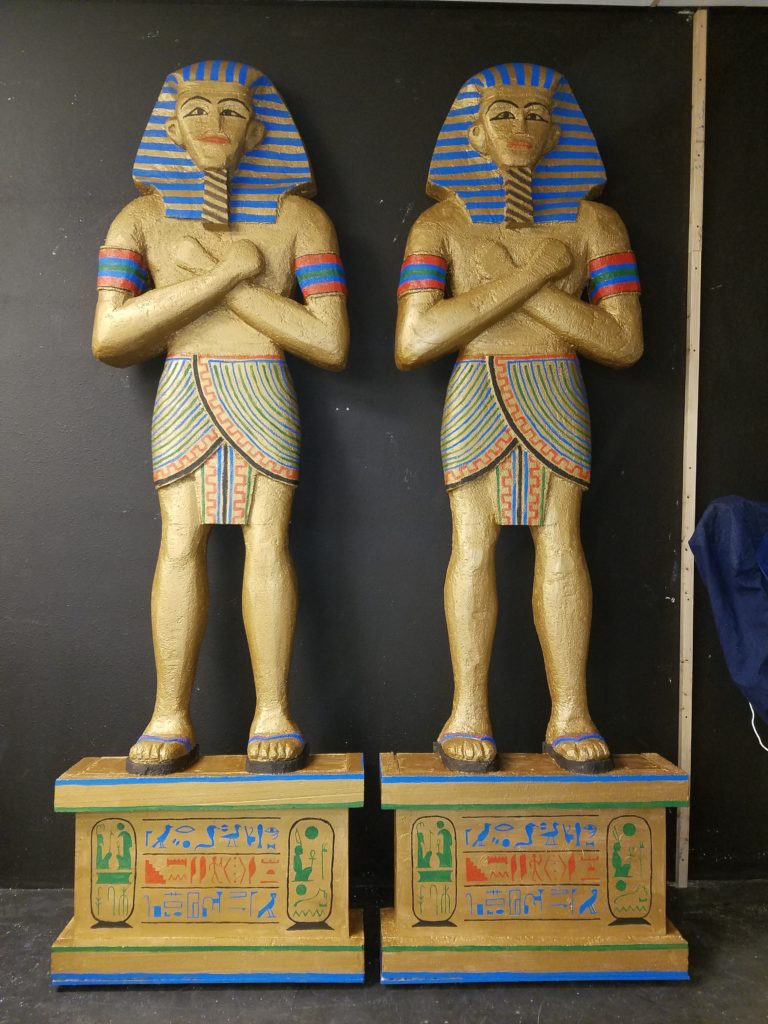
I also added some hieroglyphs to the front of the plinths. The stuff in the middle is just gibberish (but mostly real hieroglyphs). The two cartouches actually belong to Ramses himself. Here’s how you “spell” his name in hieroglyphics:

ramses-cartouches

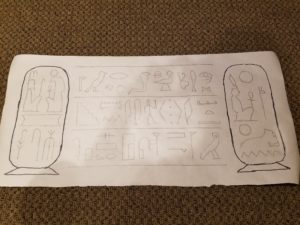
I wanted the plinths to be as identical as possible, so I worked out the design on a piece of template paper and then transfered them to the gold-plated plinth fronts with transfer paper:

20160830_125155

And here are the statues with the finished embellishments and hieroglyphs:

20160813_182551

Again, please don’t say anything about the faces. Faces are hard.

Final Touches

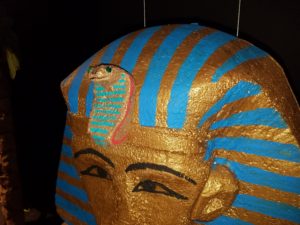
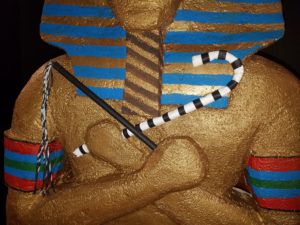
At this point I actually had to drop this project to work on another one (palm trees that turned into painted Egyptian columns). I didn’t get back to the Ramses Twins until a day or so before opening night. I realized I hadn’t added the cobra detail on the headdress or the crook and the flail in their hands. I ended up making the flail out of a dowel, with gaff tape covering the handle and strips of twisted gaff tape hanging off it for the stripes. Quick and dirty, but it worked.

The crook is a piece of coat hanger wrapped in white felt, which I wrapped in white gaffer tape. I bent it into a candy cane shape and added strips of black gaff tape.

20160829_180952  20160829_180930

I carved the cobras from foam scraps and painted them with the same paint I used on the body. Added the details (including green sequins for eyes) and hot glued everything to the Twins.

I got a lot of very kind compliments from audience members about the Ramses Twins and how great they looked on stage. But the biggest compliment came the Monday before we opened. The statues had already been hung and flown, but I needed to take some measurements to finish the crook and flail. I asked Bruce, our stage manager to bring the statues down while I got out a ladder. The director was giving notes to the cast so the stage was clear. As I was coming back, this enormous sound erupted from inside the theater. When I got inside, I saw that it was the entire cast, screaming and applauding these two set pieces, which they were seeing for the first time.

For a volunteer theater worker, that’s the best praise possible.

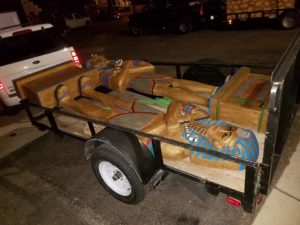
Last night, we closed “Joseph and the Amazing Technicolor Dreamcoat.” After the performance, we struck the set and hauled off the Twins to be boxed up and stored. As we loaded them onto the trailer, I kept cautioning the other helpers about how fragile the pieces were. (Foam is very delicate, and we want to be able to use these babies again.) One of the guys said, “Wow, you’re really protective of these things.”

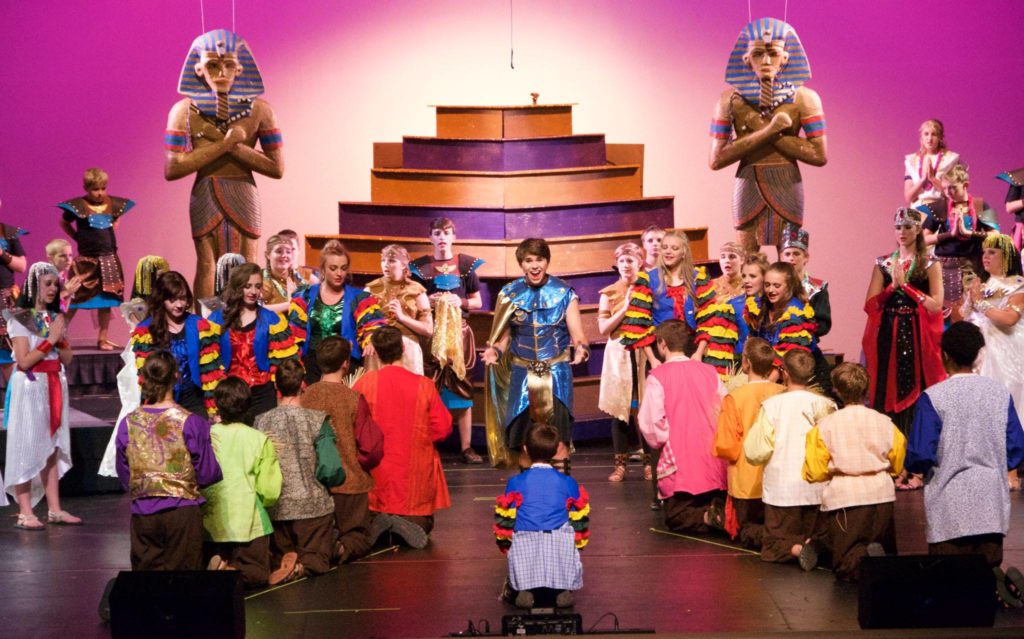
Of course I am. They took a lot of work to create. And I’m really proud of how they turned out. Here they are on stage. My son was Joseph (center stage in the blue and gold) and my daughter is the second narrator from the left.

joseph-statues

Until next time…
on-the-trailer

Shift Up to Frustration

My company recently upgraded me to a new laptop, and it almost didn’t survive the first hour in my safekeeping.

The old Dell was was working fine … except that it was no longer on speaking terms with its fancy-schmancy docking station. I use two external monitors when I’m at my desk, and while the computer was in its cradle, the monitors would flash and sputter like they were auditioning for a Pink Floyd laser show. As it turned out, it was the port on the underside of the laptop and not the docking station that had decided to fail. So it was time for a new laptop.

The new one is a Lenovo Yoga 710. It’s the kind that kind of converts into almost a tablet. It has a touch screen, because apparently that’s what laptops have nowadays. Whatever … I doubt the laptop will be doing much downward-facing dog, but it’s super light and pretty sexy for a laptop without an Apple logo on it.

It also has the stupidest bloody keyboard ever designed by humankind.

Seriously, I don’t know what the geniuses at Lenovo were thinking when they designed this thing. Did they do any user testing at all?

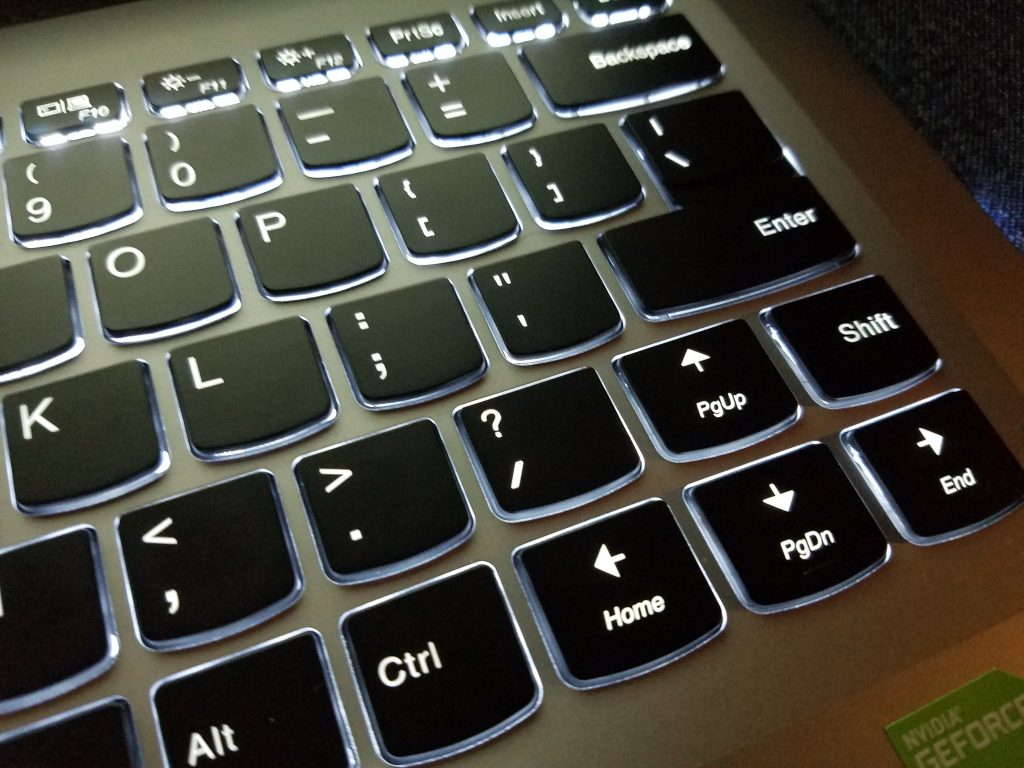
Here’s the deal. Every other keyboard in the history of keyboards has a Left Shift key to the left of the Z key and a Right Shift key to the right of the / key. (I should point out that intelligent people call it the “Slash Key,” while everybody else calls it the “Forward-Slash Key.” Nobody knows why.)

This, in case you are currently unaffiliated, is the way God intended keyboards to be. If you want to capitalize any of the letters on the right side of the keyboard, you use your left pinkie to hold down the button right beside the Z. And if you want to capitalize any of the letters on the left side of the keyboard, you use your right pinkie to hold down the button right beside the /. Glory, hallelujah.

lenovo-keyboard

But not in Yogaland. When you’re in Yogaland, the world is now tilted on its side. Sure, you still capitalize right-side letters with the button next to the Z. But if you want to capitalize a letter on the left side of the keyboard, you hold down the Up Arrow key, which happens to be the button directly beside the / (“Slash”) key, and then you type a lower-case letter (because you missed the Right Shift key altogether, as it’s in the absolute wrong effing place) and you type this lower-case letter in the middle of the word that’s directly above the place you wanted to type it, because you already hit the effing Up Arrow key to get there. So you backspace and try it again, but do the exact same effing thing because you’ve been typing on regular effing keyboards since you were in junior effing high and they’ve all had essentially the same effing layout until the stupid effing geniuses at Lenovo decided that the effing Page Up key should actually go where the effing Right Shift key should be and you do it again and again until you want to chuck the shiny effing new laptop out the front effing door and then run it over and over again with your effing car.

And you cuss and you cuss and you cuss.

Thank the Lord above for KeyTweak, some free keyboard remapping software that allowed me to save my sanity, my laptop, and my capital letters. Thanks to this Godsend tool, I was able to reassign the Up Arrow functionality to the Right Shift key, and make the actual Up Arrow do what God intended it to do, which is obviously to make capital letters with wild abandon.

I’m still debating whether to grab a screwdriver and pry off the actual buttons and put them in the places where every deity in every known religious pantheon intended them to be. Somehow, I suspect that would void the effing warranty. But I also suspect it would be monumentally satisfying.

For now, at least I’m reasonably sure I won’t throw this thing into the street and run it over with my car. And that’s a blessing.

Glory, hallelujah.

My First Half Marathon

I’ve always enjoyed running, though I haven’t always run. Lately, though, I have.

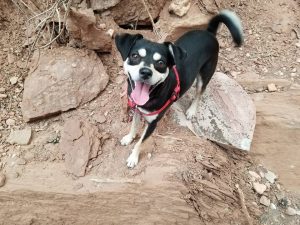
Roxy-smileEarly this year, we adopted Roxy from a shelter. Roxy is, we think, mostly Manchester terrier. We discovered pretty quickly that she really liked to run. I took this as an sign that I should probably get my running legs back into shape. Roxy isn’t a big dog, but she has long legs and (apparently) infinite stamina.

A good friend of mine, Doran, has been doing half marathons for a while. I’ve been watching him from afar as he’s trained for and completed a bunch of them. In February I made the decision that I would use my time running with Roxy to prepare to run my very first half. Roxy and I had some interesting times along the way.

Initially, I was running every single day, literally rain or shine. When this started to take a toll on my body, I went to see a physical therapist. He assured me that the constant aches and pains in my hip and legs were muscular and not in my actual joints. He planned out a daily regimen of stretching for me, and recommended that I use a foam roller on my leg muscles to help condition them. Also, he encouraged me to give myself two “no run” days a week. His advice was instrumental in allowing me to keep training.

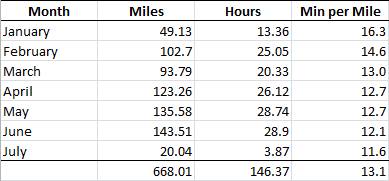
My plan was pretty straightforward. Five runs a week, with one of them being a long run (nine or ten miles). Roxy and I both prefer to run on the snakeinfested trails north of our home if the weather is good and I can get out before dark. When that wasn’t possible, we ran on the streets of my neighborhood. Here’s a summary of how my training went:

mileage-and-time

Doran and I registered for the first race that made sense: The Bryce Canyon Half. It begins at Ruby’s Inn on Highway 63 (elevation 7,652 ft.), turning onto National Scenic Byway 12 and descending through Bryce Canyon National Park, passing through Tropic and ending in Cannonville (elevation 5,800 ft.) My original goal was just to finish the race, with no expectation regarding my time. But as the race approached, I decided I wanted to try to finish in under two hours, if possible.

The morning of the race I was feeling apprehensive. My longest training run had been 10.5 miles, though that had been a trail run with lots of uphills. Doran and I had stayed overnight in Panguitch, and didn’t get much sleep that night (though to be honest, I got a lot more than he did). We got up at 4:30 to catch the bus to the staging area. The sky was just beginning to lighten a bit as we took off our jackets and got ready to run.

Here are two things I learned that I hadn’t known before:

  1. Your race bib tracks your start and finish. I’d been worried about whether I should try to get up to the front to start closer to the head of the pack, but I discovered that wasn’t even necessary. The bibs they gave us had an RFID chip in them that recprded the exact time we crossed the starting and finish lines. Knowing that now, it would probably make sense to actually begin toward the back, to let the pack thin out before actually beginning my own race.
  2. “Pace runners” are a thing. As we were lining up, I noticed these people holding sticks with signs on them that said “1:55,” “2:00,” “2:05” and so on. Apparently this is pretty common. These people run the race to strict times that allow other runners to pace against them, so they can finish in the time on the signs. Pretty cool idea, though obviously the staggered starts caused by the RFID chips make that a bit less than 100-percent accurate.

The gun went off and we all started running.

The first two miles were flat as we chugged down Highway 63 and onto the 12. Right at about the two-mile mark, the road went over a little hump and dove down at a pretty steep grade. I was feeling great, not even winded, but began to feel the pull of gravity. Not liking the pace dictated by the downhill course, I kept switching between leaning back and just giving in to it. Miles three and four were the steepest, and then the grade got a little easier to manage. A lot of people blew by me as I caught up to the 1:55 pace runner. I had my music cranking and just kept putting one foot in front of the other, enjoying the scenery.

At the end of mile four I dosed my first gel pack. This is something I’d read about, and experimented a little with in my training runs. They’re basically an ounce of gooey sweet stuff that you squeeze into your mouth, providing calories and electrolytes that get into your system quick. I carried a water belt pack (though the race had plenty of water/Gatorade stations) because I wanted to be able to hydrate when I needed it. Washed down the sugar. Still feeling great.

At the six-and-a-half point I shouted out, “Halfway there!” I don’t know what kind of reaction I expected, but nobody responded. Too busy running, I guess.

Somewhere along mile eight I began feeling the burn. I’d been sneaker-stalking Miss 1:55, but she ducked out at some point, probably because she was ahead of schedule. I found myself gaining on the 1:50 pace runner, and then I lost her. I also started seeing a few runners limping and stretching on the side of the road—either they had cramped up or they were in some kind of distress. Luckily, I didn’t feel any of that … just the burning legs. We hit a few short uphill sections and I shortened my stride but upped my pace. Passed several people going up, which felt pretty good. A lot of my training trails are uphill.

Something happened around mile ten that bothered me. I thought I’d been paying attention to the mile-marker signs, and the voice on my phone kept on counting off the half-miles. Somehow, though, I got it into my head that I’d passed the ten-mile mark, so I was expecting eleven to come pretty quickly. Just two miles after that. Piece of cake. Then, when I approached the next orange sign, it said 10 and not 11. That kind of set me back. Three more miles … not two. My head must have been getting foggy. We hit another up-grade and I concentrated on putting one foot in front of the other. Again and again. Again and again.

Once I actually passed mile eleven, the last two miles were sheer willpower. Another rise, then a flat section, then eventually the long, gentle slope into Cannonville. I saw a crudely written marriage proposal on a flattened cardboard box. (“Will you marrie me?“) I saw some other signs, and passed a family parked on the side of the road holding a banner. I can’t remember who they were rooting for. Too busy running.

I tried to pick up my pace as we made the final turn leading toward the finish, but honestly, I think I simply kept going. I had no idea where I was in term of time, because I wasn’t paying attention. Didn’t want to fumble for my phone. Just kept running. Turned into the parking lot and crossed the pad. Someone put a medal around my neck. My legs were burning pretty good and I walked around on jelly knees. It took a moment or two to realize my phone was still ticking away. I took it out and stopped the clock. The time said 1:52:29. I couldn’t believe it. The number seemed impossible.

I made my way back to the corner to wait for Doran. As I stood there, a teenaged girl (probably around 16 or so, wearing her school’s cross country team shirt) looked at me and said, “Oh, it’s you. I was pacing against you.” Wow—I’m three times her age. That felt good.

Doran came in after a little while, and we grabbed our refreshments. The chocolate milk was already gone, but they had bananas and ice cream sandwiches. Yum.

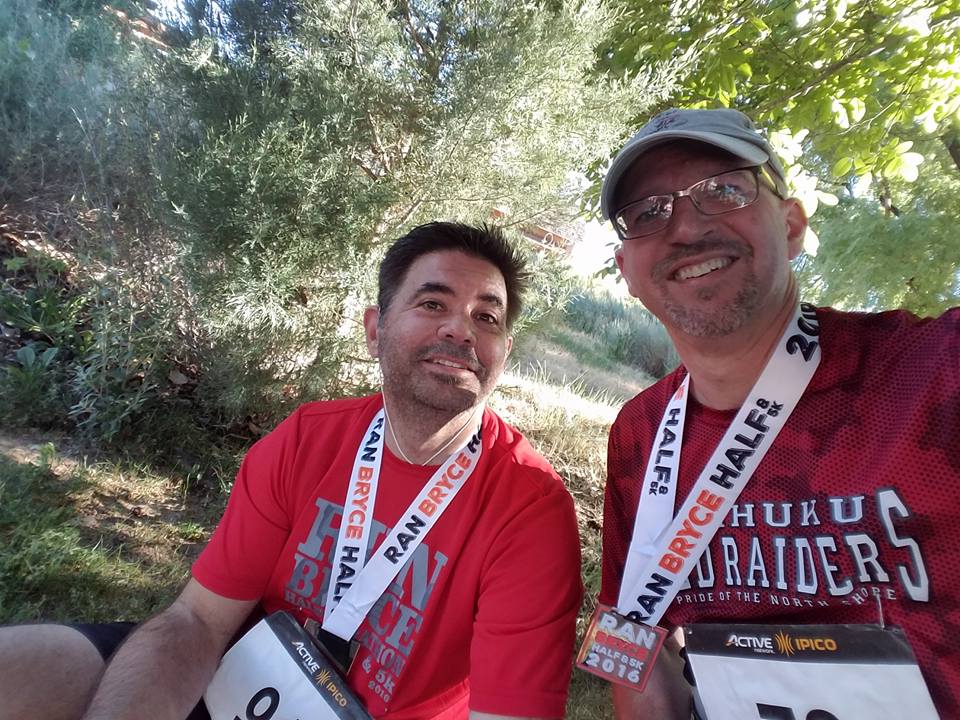
bryce-canyon-half-recovery

Just before we left, I walked over and checked the posted times. I turned out that I had done even better than I thought. My final “chip time” was 1:50:05. That means I averaged 8.4-minute miles over 13 miles. Unbelievable. I came in 17th in the “male, 45-49” category, and 253rd overall. I still don’t know how I did that.

You only ever get one first half-marathon, and this one was a great experience. Now that I know I can do it, I’m going to begin experimenting with different training regimens, different courses, different music, different paces—anything I can do to maximize my results. Yesterday I registered for my second half … coming up in three weeks. I’m planning on a third race in September and another one in November. After I have four halves under my belt, I just might start thinking about considering the possibility of maybe deciding whether I might want to attempt a full marathon.

… Maybe.
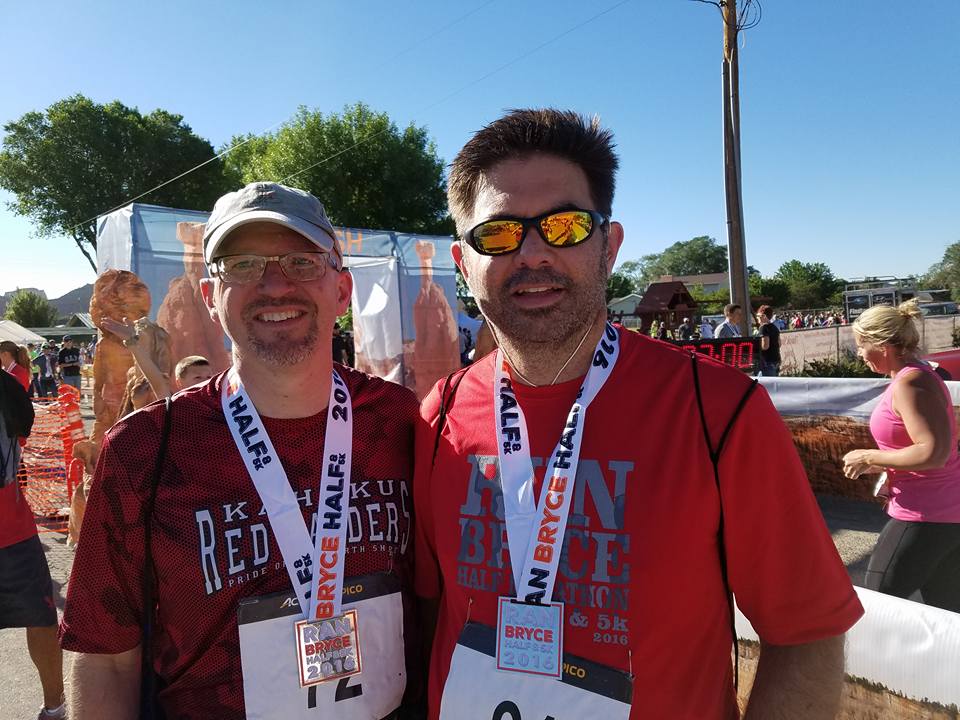
bryce-canyon-half-finish

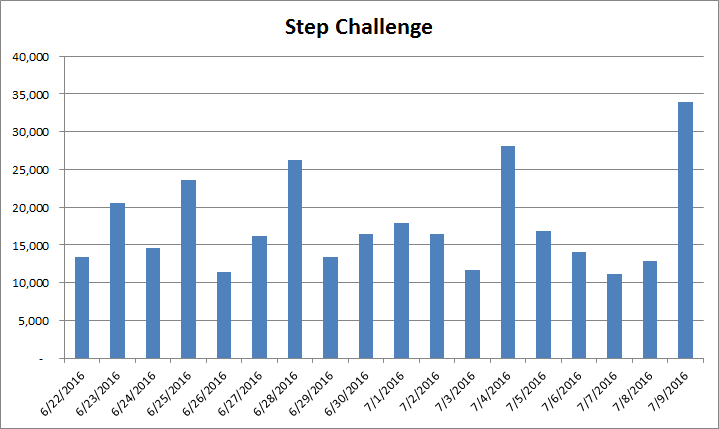
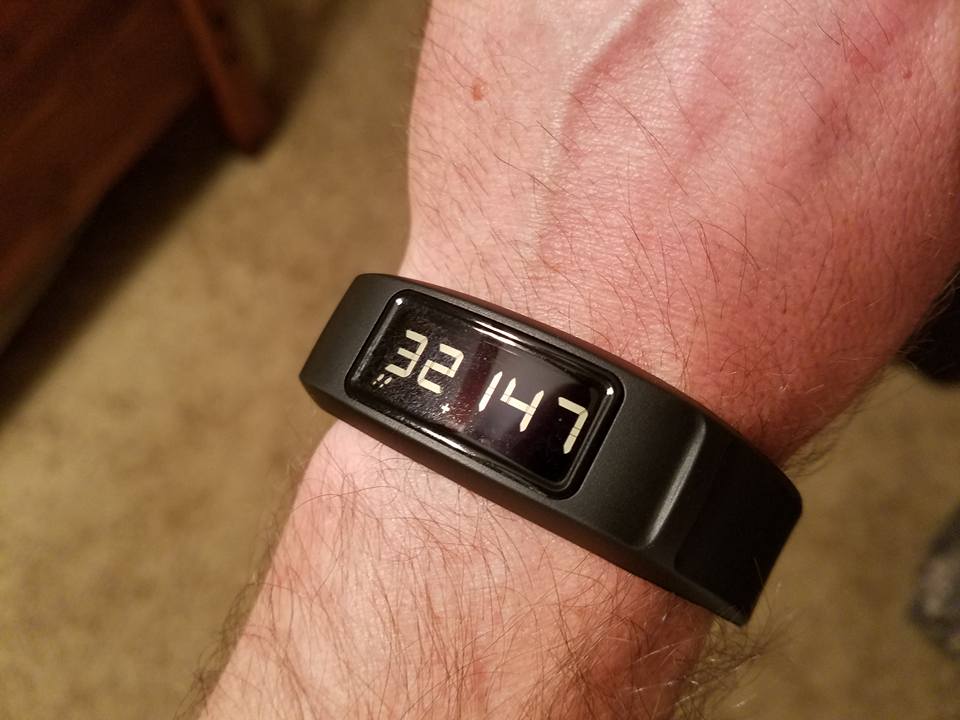
Incidentally, this whole run-up to the half also coincided with a “step challenge” going on with my wellness program at work. I got my fitness tracker a week into the challenge, at which point I was #3 on my team (based solely on the runs I was tracking via MapMyRun). The person on my team in first place was averaging in the neighborhood of 9,500 steps per day. With all my training—my short and long runs, and the other stuff I’ve been doing—I ended up with an average of 17,699 steps per day.

At the end of race day (last Saturday), I had 33,899 total steps. (That happened after I took the photo below.)

step-challenge

step-challenge

My Truck Stop Writing Haven

In one of my early posts on this blog, I talked about how I love to write in restaurants. It basically comes down to this: I’m more productive when I write just about anywhere but at home or my regular work environment. I’ve tried many times to actually figure out why this is the case, but in the end I just learned to accept it. I write best when I “go to work”—as long as it’s not the place where I do my regular job.

My requirements for an away-from-home “writing office” are as follows (and in this order):

  • I need to be isolated in the middle of other people.
  • I often stay late into the night—so the place should be open past midnight, if possible.
  • A little background noise/movement is great. People-watching opportunities are welcome. Too much of either … not so good.
  • Caffeine, caffeine, caffeine.
  • Wi-Fi access is a definite plus.
  • Power outlets are my friend.

I’m not a morning person. I write best at night. When I lived in Phoenix and then later in Salt Lake City, there were plenty of places around where I could take my laptop and park myself for a two- to four-hour writing session. As I’ve mentioned before, more often than not I would end up in a late-night McDonald’s restaurant. They all have Diet Coke on tap. They all have Wi-Fi. Many of them have almost a one-to-one table-to-outlet ratio. With a large drink costing just a dollar, that’s a bargain in every sense of the word.

DraperMcDonalds

Image courtesy Google Street View

I wrote almost all of my first NaNoWriMo novel (the one I’m currently shopping around to agents) in the McDonald’s at the intersection of Bangerter Highway and I-15 in Draper, Utah. Technically, the dining room was only open until midnight, but the lady who ran the joint allowed me to stay as late as I wanted. (Their drive-through stayed open 24 hours, so it wasn’t like they were sticking around just to let me pound out words on my keyboard.) They cleaned around me. I bought a drink (and sometimes an apple pie) and I was grateful. Often they gave me free food.

Now I live in Cedar City. Our family loves it here. It’s a small town in southern Utah about three-and-a-half hours south of Salt Lake City and two-and-a-half hours north of Las Vegas. We have a large state university (Southern Utah University) and world-class theater (The Utah Shakespeare Festival and the Neil Simon Festival) and we’re not far from even more amazing entertainment down at the Tuacahn Amphitheater. We also have clean air and amazing scenery and beautiful sunsets and phenomenal hiking trails.

What we don’t have a lot of is restaurants that stay open late. We have two McDonald’s-es in town. One closes at 10:00 p.m. (11:00 p.m. on weekends) and the other is in a Walmart Supercenter. That one has a metal gate that rolls down every night at 9:00 or 10:00.

So what’s a guy to do?

My 24-Hour Options

I have two:

Subway/Love’s: My go-to “writing office,” Subway is open 24/7 and I can buy a bottomless drink for $1.50. It’s less than a mile from home and provides almost everything on my list above. When I say “almost,” I’m talking about the Wi-Fi. There are six networks in the building, but not one of them is for public use. The Carl’s Jr. next door supposedly has Wi-Fi, but it hasn’t worked in several months. Power outlets galore. Friendly workers.

Valerie’s: A 24-hour taco shop on 200 North just off I-15. This is a three- or four-mile drive for me. Valerie’s used to be a Sonic Drive-in, but they now only do drive-through and eat-in. There’s a room in the back that is rarely used—except during their lunch rush and by me. The place has strong Wi-Fi and all-you-can-drink Diet Pepsi, but no available outlets.

That’s it. If I only want to work until midnight, there are a few more options: both taco joints. If I don’t mind driving, I can go to the 24-hour KB gas station in Parowan, 15 miles away. They have a grill that serves pretty good food and a huge assortment of fountain drink options. I can get caffeine, but no Wi-Fi. But sometimes the trek is worth it just for a change of scenery. Also, there’s an adorable cat that digs in the garbage outside, and I sometimes watch him/her when I get stuck on something.

“Close to His Office”

Image courtesy Google Street View

You know how sometimes it’s hard to recognize people when you see them out of context? Last year, I was trying to place this guy I’d seen several times at church. I finally figured it out—he worked at my Subway. Daniel and I got pretty friendly. We’d sometimes talk when he was on a break. Sure, it cut into my writing time, but he was a good guy and I didn’t really mind.

A few months later we were at a church function and someone asked Daniel where he worked. His response:

“I work right by David’s office.”

My actual office (in downtown Cedar City) is about three miles away from the Subway out at the junction of I-15 and North Main. But I got it. He worked at the Subway counter, making sandwiches while I toiled away at my laptop a few yards away. Daniel and I shared a good laugh about that.

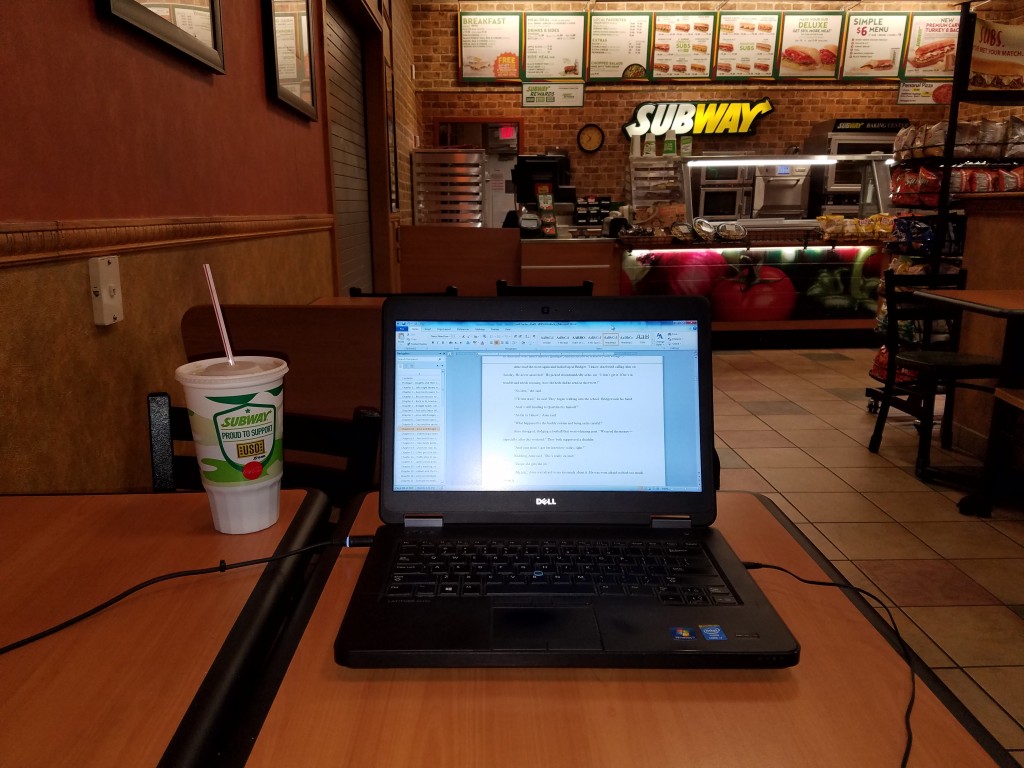
I was working at the Subway/Love’s last night and took a photo of my “writing office.” So here you go, folks. Here’s where the magic happens:

20160510_225310

#AmWriting

Avengers Sneakers for Megan

Anyone who knows me knows about my weird hobby of painting shoes. I’ve been doing it since high school. The idea is just so obvious:

  • Some artists paint on canvas.
  • Some shoes are made of canvas.
  • Why not paint on shoes?

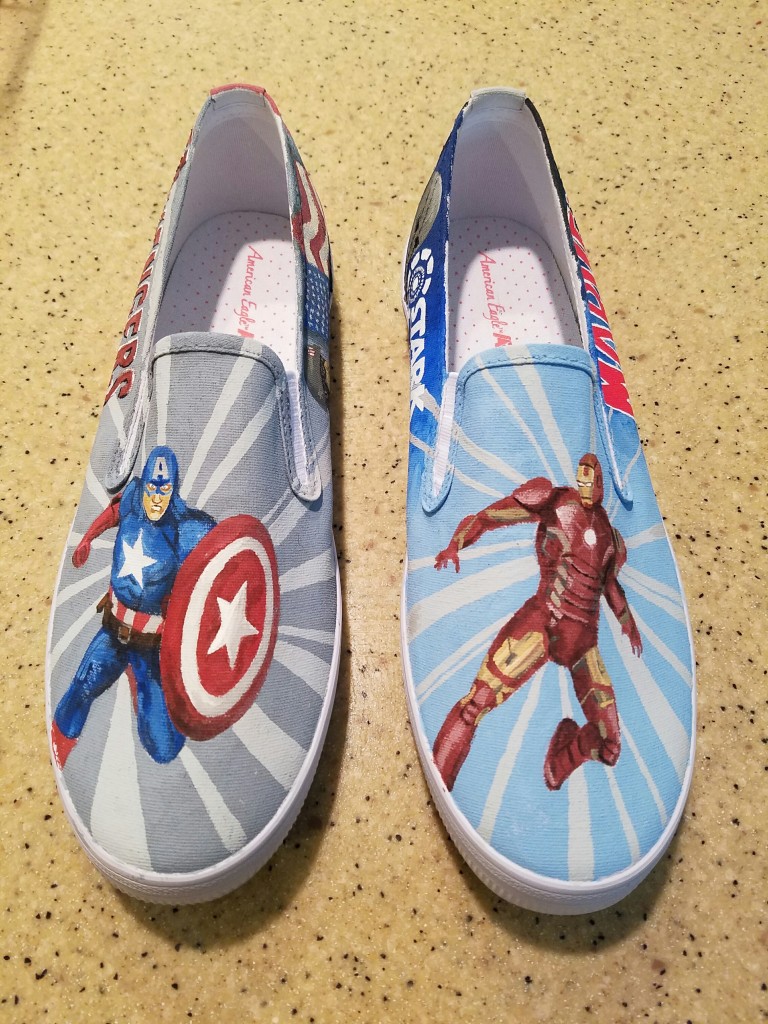
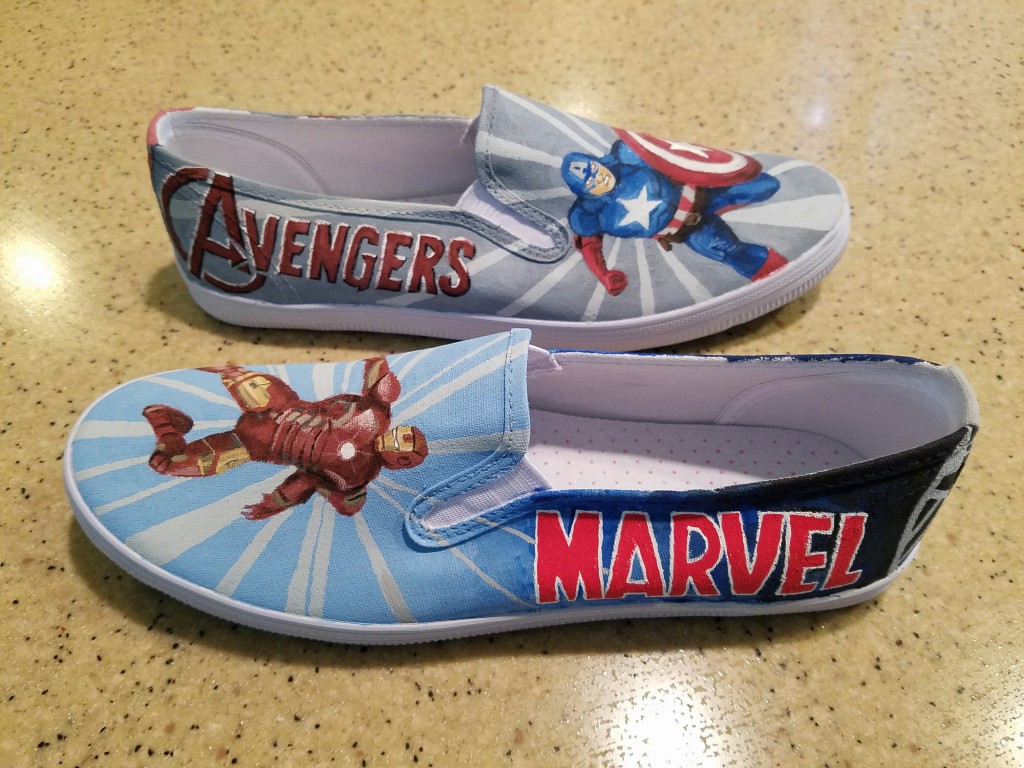
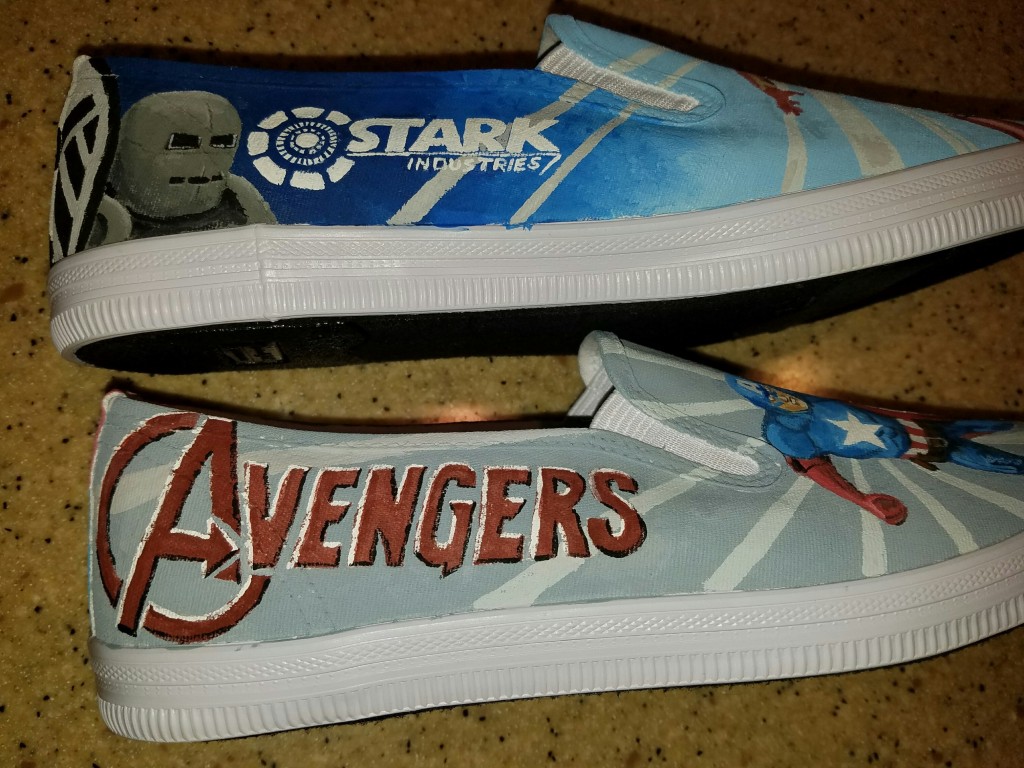
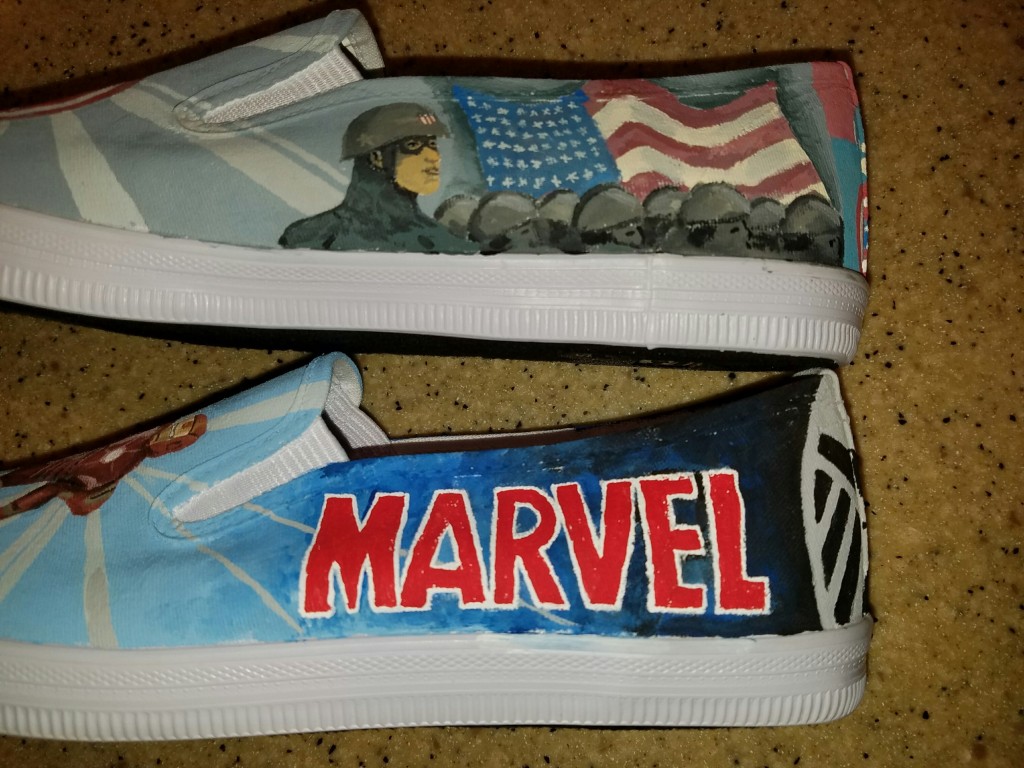
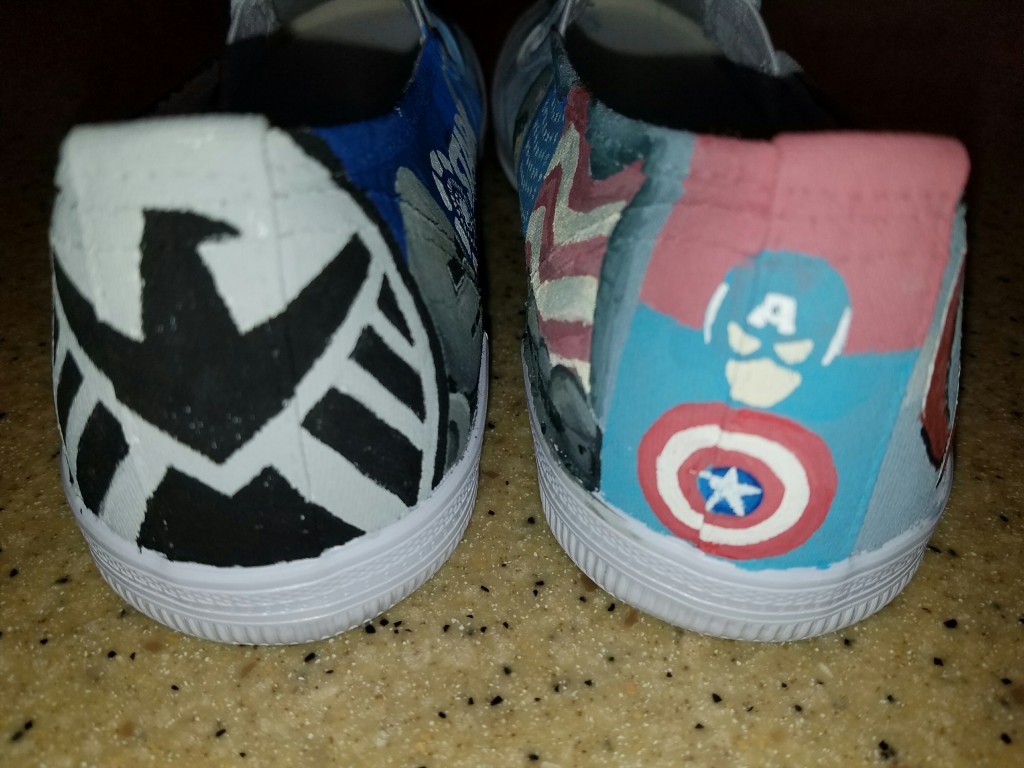
After I recently painted a new pair of Converse All-Stars for myself, I told my kids it was time for them to have their own painted shoes. Since she was having a birthday, Megan got dibs. She’s turned into a major Marvel fan lately (the movies and TV shows—not the comic books) and has been looking forward to the movie Captain America: Civil War. Because of this, she wanted me to do dueling Captain America/Iron Man shoes. We’re pretty happy with the results:

20160507_113154_resized

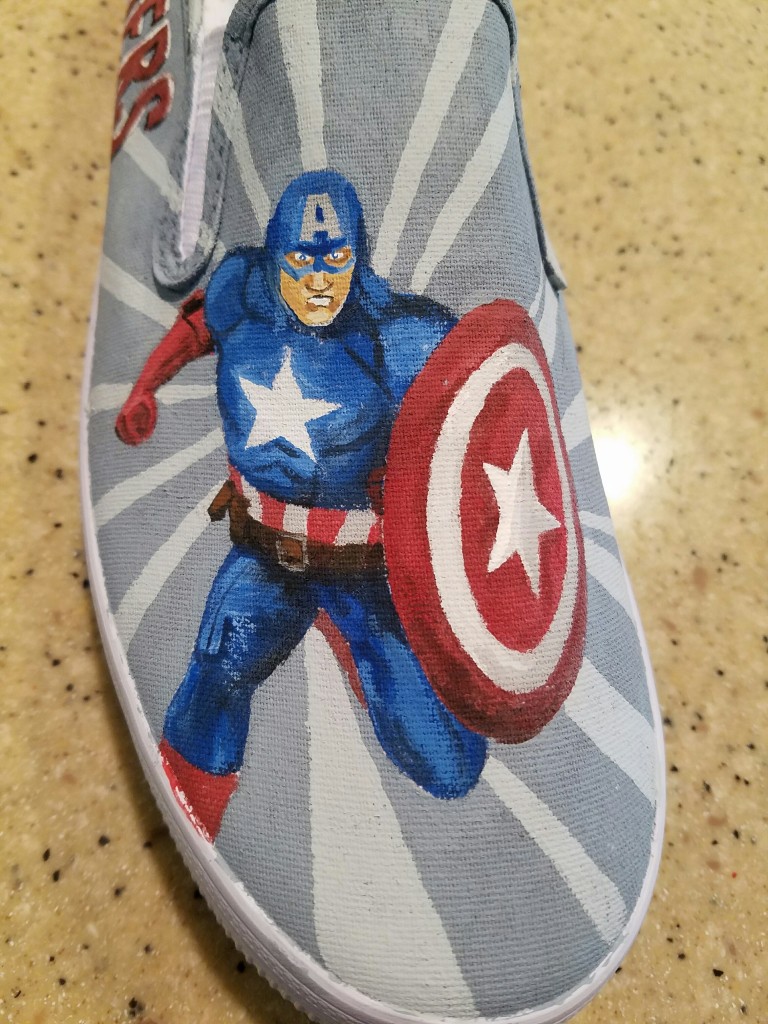
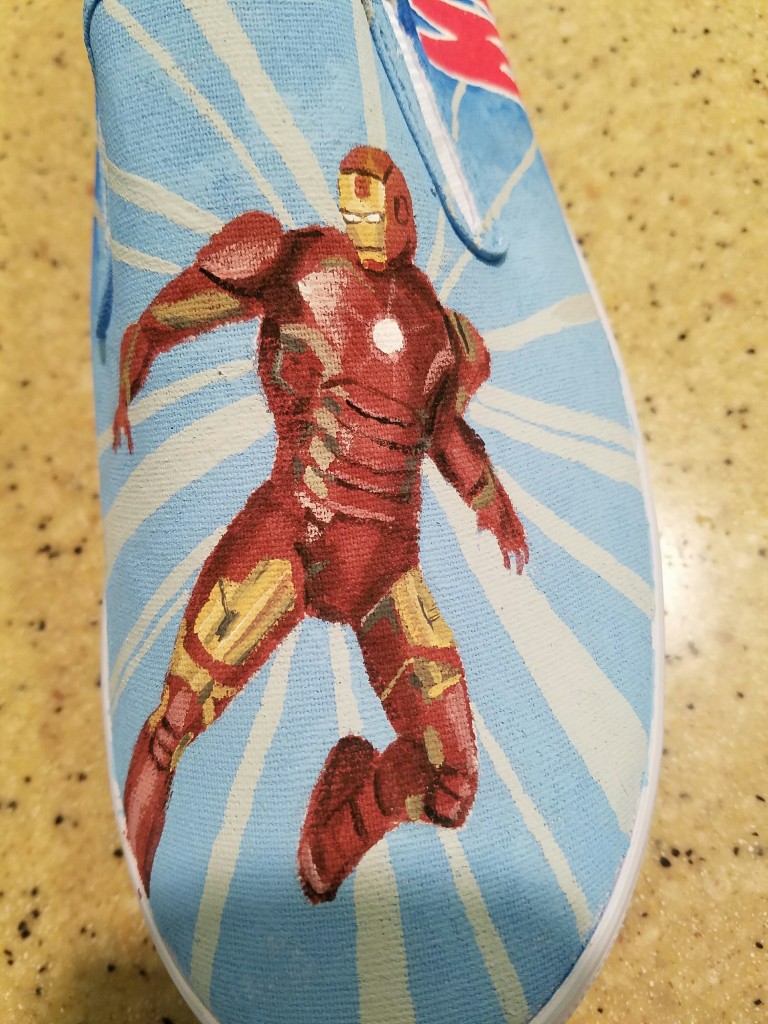
With slip-on sneakers, the largest area of canvas on the shoe is the toe. Since Civil War is all about the conflict between two of the most important Avengers, it made sense to give them the primo spots. Captain America went on the right, and Iron Man went on the left.

Here are some close-ups on the main character designs: Click the images to view close-ups.

Captain America close-up

Close-up of Captain America. His costume has changed so many times, it was just a matter of picking one. Faces are hard.

Iron Man close-up

Just like Cap’s suit, Iron Man’s armor changes from movie to movie. I’m not sure which version this is, but I really like the pose.

Please read absolutely nothing into the choices for right and left. It was purely coincidental, though completely appropriate. In the movie, Steve Rodgers (Captain America) resists pressure to give up his personal liberty to the United Nations, while Tony Stark (Iron Man) advocates for greater government control.

“Those who would give up essential Liberty, to purchase a little temporary Safety, deserve neither Liberty nor Safety.”

—Benjamin Franklin

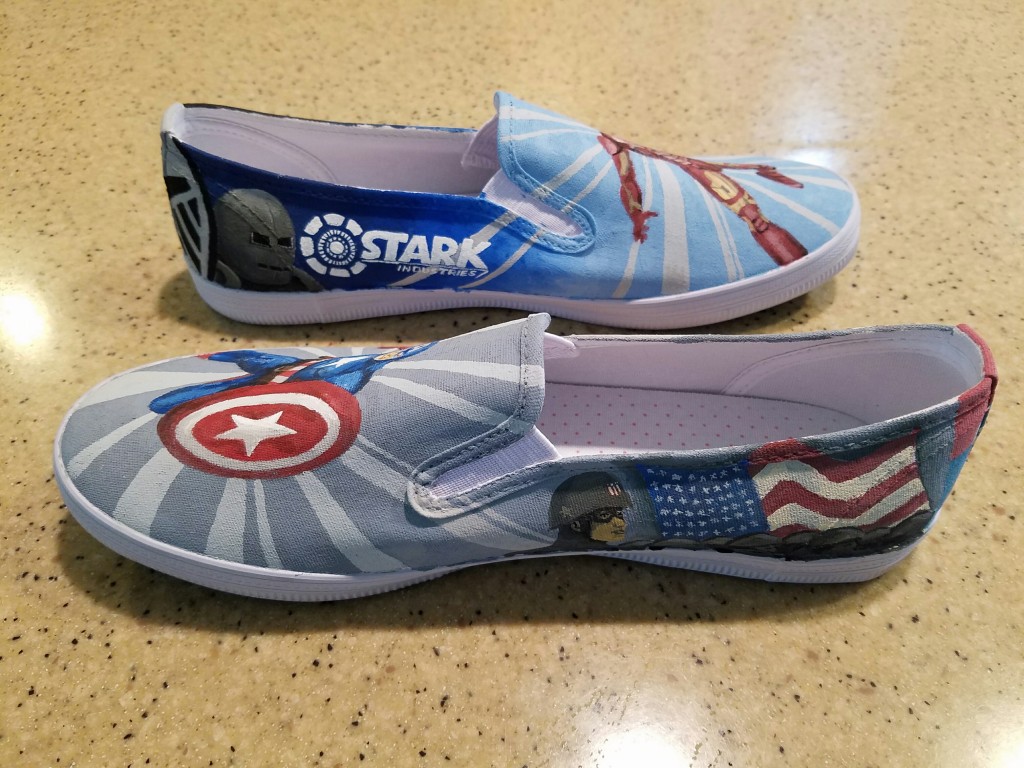
A few more images from Megan’s Avengers Shoes:

Avengers shoes, side detail

Avengers and Marvel logos

Avengers shoes, side detail

Proto-Iron Man and the Stark Industries logo, vs. a retro Cap design with WWII-era flag and marching GIs.

Avenger shoes side detail

More side detail.

Avenger shoes side detail

More side detail.

Avenger shoes back detail

Shield logo and stylized Captain America character.

The movie is all kinds of awesome. Go see it!